Pages

Wednesday, August 19, 2015

The story of "the damn chair"

A couple of weekends ago, my girlfriend and I went to support our friend at her booth at the popular event in LA called Unique LA. When we arrived at her booth we both noticed this really awesome clear acrylic chair, you know, the ones that are on sale at Homegoods for $199. We all want one, but who in the world spends $199 on a chair you can’t even see?  ;-)

We spent like 5 hours cruising around the showroom, drooling over the Sriracha popcorn from SpoonMeSweetly, dying over the adorable notecards from SweetLittleNothingsXO and picking up a couple things from a booth having a $10 sample sale. I think our favorite booth, aside from the one we were apart of, was the NKLA booth. NKLA stands for ‘No-Kill Los Angeles’ and is “A Best Friends Animal Society Initiative”. Since they launched, NKLA has helped the number of pets being killed in LA decrease by 56%! I’ve already signed up to be a volunteer and you can sign up too by clicking HERE.

When the day came to an end, we packed up all of our goodies and before we started to walk away from the booth my girlfriend mentioned the “damn chair”, why doesn’t anyone else have one of these at their booth? Do you know where this chair came from? …Do you think anyone would notice if it weren’t here tomorrow? At that point we all just stared at each other for a second and the next thing I knew I was carrying the “damn chair” past a volunteer, while sweating, and hoping that either she would turn her head at the right time or that, since the chair is clear, she wouldn’t see it resting on my hip. WE MADE IT TO THE ELEVATOR! Next step, make it past the volunteers by the parking structure payment machine. WE MADE IT TO THE SECOND SET OF ELEVATORS! It was then that I said to my girlfriend “I’m really jealous that you’re getting this chair, I’ve wanted one for as long as I could remember”...her response…wait for it…“oh, you can have it, I just wanted to see if we could make it past the volunteers without getting caught”. So what you’re telling me is, if we did get caught, I would be the one holding the damn chair? I would be mad at you if I hadn’t just scored this DAMN CHAIR!

When I returned home, I was like "Hey Dad, so look at this really awesome chair I got today!.....fast forward to after I told him what had happened and how I acquired the "damn chair". I kid you not, his exact words were "Well, it's not like anyone saw you holding anything. I mean, it's a clear chair, no one can see that thing and it's not like anyone will miss it, they didn't even know it was there to begin with"

In the end, it was a hilarious story that we’ll remember for years to come and it’s a great addition to the office area in my room. Take a look for yourself below...


Tuesday, June 23, 2015

Welcome to the all new Maegs Bakes Cakes experience!

Hey Guys and Gals and welcome to the all new Maegs Bakes Cakes experience! I am so very excited to launch this new video series and can't wait to go on this fun new journey with all of you! I put together a quick welcome video to introduce myself and tell you what we're going to be doing in the coming weeks. Do me a favor and leave me some comments below letting me know what you want to learn!

XO

Wednesday, June 4, 2014

An open letter to my followers…aka my family.

Last year my good friend Holly from Glamour Mash wrote an incredible blog entitled “An Open Love Letter to Clinton” to her now fiancĂ©, Clint. Needless to say, it was breathtakingly beautiful! If you know Holly like I do, then you can’t help but love every inch of her and to see her so happy and in so much love just makes me so happy!

Her blog spoke to me for a number of reasons. I admired her courage to share her true feelings with the world and a year later I just can’t seem to get the title out of my head. Hold tight, you’ll understand why in the next paragraphs.

If you follow me on Instagram, then you know I recently passed the 2,000 followers mark. It was a pretty cool and slightly awkward feeling to know that that many people actually care what I have to say about cakes and glitter. I work hard for my followers, I don’t buy my followers and I block spam accounts.

So, here’s how Holly’s blog and my milestone come together….I want to share my own ‘love’ letter with you, my followers, my family. Sometimes I think we get lost in what we perceive to be true about someone based on the posts, likes and dislikes. I want to be completely transparent with you, so here goes, a few things you may not already know about me…

1 – I have no formal pastry training. I spent one semester in high school in Home Economics which is where I learned how to properly fold a batter, separate an egg white from its yolk and that I generally dislike ‘cooking’. Is that weird? I can make one hell of a salad but a full meal is just out of the question.

I’m sharing this with you because I want you to know that it doesn’t always take a degree or hundreds hours of training with the top chefs in the industry; it takes passion, dedication, love and loyalty to your craft. I spend countless hours in my kitchen experimenting with new flavors and sometimes I fail miserably. Don’t even get me started on the meringue fail of 2014. (LOL!)

2 – I’m the daughter of the strongest woman on the planet. My mom had me when she was just 21 years old and from day one it was me and her against the world! We had nothing but each other and that’s all we needed. I shared my mama’s bed for my first few years on this planet and we spent most nights at restaurants where kids ate free and my mama would have a side salad and water; just to make sure I was getting enough to eat before bed at night. Deedee Romanello is and always will be my hero!

I’m sharing this because I want you to know that you don’t have to be rich or have a famous family to achieve greatness. My mother achieved greatness by working her ass off day in and day out and never taking ‘No’ for an answer! Also, the woman ties one hell of a bow, makes the best mashed potatoes ever and should be the poster woman for loyalty. I will share a quick quote from this fine woman “If I love you or if you’re my family, I will F*ck someone up for you” Get em Deeds!

3 – I hate cake…I LOVE Funyuns! I feel like this one explains itself.

I’m sharing this because I want you to know that there’s much more to my craft than just the cake or cupcakes. Just to start there’s cupcake toppers design, topper creation, choosing the perfect liners, the cake plates, designing the stands, the glitter, the menu…I could go on for hours! So, please don’t roll your eyes when you hear prices from an at home baker or a small business owner, we take a lot of time to make each order perfect and sometimes we don’t profit more than $10.

Side note, for those of you who wonder how I stay thin while baking cupcakes and cake, now you know…I don’t eat any of it! My dad and my sister Gabby are the designated tasters for MBC so you can thank them for my menu.

I hear one more person say “I thought you weren’t supposed to trust a skinny baker?” and I’m going to scream. Let’s really think about this…are you honestly going to trust the fat dude who can’t seem to put the cupcakes down? At least when I deliver you know they will all make it to their destinations. <--- Lawyered! (that was dumb, huh?)

4 – I was never popular, never had a ton of friends and didn’t get asked to prom. I was the girl in the back of the class wearing overalls (when they weren’t cool) and chewing on my hair. Not my best moments, but they shaped the person I’ve grown into so I guess that’s a plus. I lived in 6 different states by the time I was 12 years old (CA, AZ, OK, WA, NV & OR) and I was made fun of a lot because I’ve been 5’9” since I was in the 6th grade. I was the skinny/gangly/awkward girl that had no idea how to use a hair straightener and what to do with a bottle of mascara. Here’s what I did know; I knew I wanted to build something to make my parents proud and to leave to my future kids someday. The things that I hope my little girl someday thinks about…

To this day I’m still insecure in my own skin but I’m learning, with the help of a few close friends, that no one is perfect and no one has all of life’s answers. All we can do is try to be the best versions of ourselves.

I’m sharing this because I know that I have a lot of young girls that follow me, I know because I read all of their sweet messages and emails. I want every one of you girls to know that you don’t need to be the popular girl, the captain of the basketball team or the prom queen to make a difference in your life or the lives of those around you. Remember to smile big, stand tall and hold your pretty heads up high because you never know who is watching.

5 – I read every message or email I get and look at the profile of every single person that follows me or supports me and my work on Instagram. I may not be able to reply to each of you personally and it may take a few days for my response but please know that I see them and they keep me strong.

I’m sharing this because I want you to know that you mean the world to me! You, the person reading this blog, mean more to me than you will ever know. The fact that you took the time to read this entire blog and to follow me on my road to cupcake greatness makes me feel like a million bucks. It keeps me going when I haven’t slept in 2 days and it keeps me going when I think I’ll never get another order.


So, to all of you, THANK YOU from the bottom of my heart. You are the reason I get to continue to do what I love.

Monday, March 17, 2014

DIY Tutorial: 'Alphabet Block' cake stand

I hope you have as much fun making your boxes as I did! Make sure to post pictures using Hashtag #MaegsBakesCakes so I can see your creations.

Supplies needed:
6”x6” USPS shipping box
Wrapping paper (I use brown kraft paper rolls from the Dollar Tree)
Mod podge
Glitter
Sponge brush
Letter Stencils (I’ll show you how to prepare these in the steps below)

Step 1: Build shipping boxes

Step 2: Wrap boxes with the kraft paper or whatever color you chose for your stand

Step 3: Cut stencils you made using the WordArt function in Microsoft Word. I made my letters 4 inches tall using the Arial font.

Step 4: Using one of the stencils from step 3, place it on the box in the center and start brushing the Mod Podge over the stencil so it sticks to the box. The first box I made was a little tricky but I found that if you hold the stencil with your left hand and brush with your right about an inch down at a time, it’s much easier. (Let each side dry 10-15 minutes before moving on to the next side to ensure the glitter is secure.)

Step 5: Mod Podge dries pretty quickly so you will want to get your layers of glitter on the box and fast as possible so you have an even coat of glitter. I let the box dry overnight and then I went around the edge of the box to clean up the holes and box edges.


My finished boxes front and back.


 Please feel free to email me at MaegsBakesCakes@yahoo.com with any questions. Xo


Wednesday, November 13, 2013

there's no place like home...

hey guys and gals, sorry for being so MIA lately, I've been so busy baking that I haven't had any time to actually write about my cupcakes. I found a moment of peace so I thought I would share with you the event I catered last weekend for the Center for Spiritual Living in Costa Mesa. The theme of the event was the Wizard of Oz so obviously I was over the moon to create the display using the yellow brick road.

I wanted the display to tell the story of the movie so I created a dazzling yellow brick road display and created a custom menu for the event. Check it out...

Menu:
Dorothy - a vanilla cupcake in a blue checkered liner with a ruby slipper or a poppy for decoration
Scarecrow - a brown sugar cupcake in a brown liner with a burlap bow for decoration
Tin Man - a red velvet cupcake in a silver liner with a red glitter heart for decoration
Lion - a peanut butter cupcake in a gold liner with a gold crown for decoration

Cake - A vanilla and red velvet striped cake to resemble the Wicked Witches tights


thanks for stopping by! XO

Monday, July 29, 2013

DIY: Cupcake Stand To-Go

DIY: Cupcake Stand To-Go

I love family birthdays, it gives me an excuse to create a fun cupcake display for the birthday boy or girl. When I set out to create my display I knew I needed one that could withstand a 5 hour drive and hold 60 cupcakes. Of course they were all way over priced.  I remembered a few years back my Cousin had shown me a trick she uses to create her multi tiered fruit displays for family parties. Her secret, USPS boxes, she keeps any boxes that are shipped to her house in anticipation of a repurposing project. Directions and pictures below...

Total Cost: $4

Supplies you’ll need to create your Cupcake Stand To-Go:
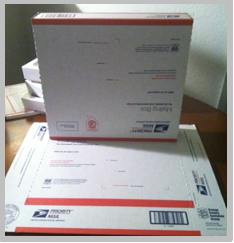
3 medium flat rate USPS boxes (I  keep any boxes that I receive in the mail)
Tape (I used clear masking tape)
Paint (I used acrylic paint from Michaels, $2.50 with my 40% off coupon)
Paint brush (any kind)
Scissors

Box #1 – Base
Box #2 – Top Tier
Box #3 – Middle and Bottom Tier

Step #1 – Place Box #1 flat down for your base
Step #2 – Build Box #2 and place ¾ of the way back on Box #1, place a small piece of tape, enough to hold the box down
Step #3 – While laying flat, measure Box #3 8 inches, the bottom half will be 4 inches; these are Tiers 2 & 3. Cut the box where you measured to make two half boxes.
Step #4 – Build the half boxes to make Tiers 2 & 3
Step #5 – Place the 8 inch Tier in front of the tallest Tier and tape enough to hold it in place.
Step #6 – Place the 4 inch Tier in front of the tallest Tier and tape enough to hold it in place.
Step #7 – Paint the stand (I painted 4 coats to be sure the tape was covered) and you’re ready to create your display!

Sunday, January 13, 2013

reduce. reuse. recycle what you already have!

some may consider me a "hoarder". let me be more specific, my mother would consider me a hoarder. i'm not saying i completely disagree, i'm just saying there's a method to my madness. i like to "hoard" certain things that can benefit me in the future, such as, ribbon, gift bags, purses, shoes, scrapbook paper and designer magazines. i'm always trying to find cheap ways to decorate our house so i like to have supplies handy in case i randomly come up with an idea or if i see something on pinterest. and lets be clear, it's not out of control...

the past year i have developed a new obsession, designer bags, and by "bags" i don't mean the one's we wear; i mean the ones the bags we buy come in and their boxes. i saw this picture of a woman who framed and hung designer bags in her office and i thought to myself, maybe one day i'll have entire wall like her, until then my extra large tiffany bag that i framed for the bathroom will have to suffice. just because i can't shop like carrie bradshaw doesn't mean i can't decorate like carrie bradshaw.

this weekend i decided my ribbon collection needed some organizing and i remembered i got the most amazing victoria's secret boxes with one of my christmas presents this year so i got to work. then one thing led to another and well, you'll see below...


doesn't it look fabulous like this?


i was so excited when they fit perfectly. i have another box
on the counter that has playing cards instead of business cards.

what kind of "supplies" do you like to "hoard" ;-)